My Adobe Lightroom Secrets: How to Streamline Your Photo Editing Process has developed over several years of taking photographs and editing them for Social Media and for clients. The most important part of my photography editing process is my workflow – what steps do I take when I am transferring my photographs from my camera until I am done editing those photographs to be used for Social Media posts, for clients, for a photobook, or to be used in future projects. My workflow has been fine-tuned over several years, and if I learn something new to make my workflow either better or faster; I take steps to immediately add those new steps to my workflow. My workflow is always a work-in-progress!
Why Use an Editing Workflow?
There are several reasons for having a good editing workflow and using that workflow in your everyday editing process. First and foremost, having a good workflow in place will save you time. Once you have a smoothly run workflow you can spend more time on marketing or doing more gigs. With a good workflow in process, you can more accurately estimate how much time it will take to edit your set of client photographs. You can easily search through your archive of photographs for a specific need, i.e., photos of wildlife, landscape, interior design, architecture, to show your skills to a potential client, or to use photographs for a specific use. And most importantly, a backup plan that you use regularly can help to mitigate hardware or other problems that could occur.
My Workflow
My computer workstation is running on Microsoft Windows 11, as well as my Microsoft Surface Tablet. I use Microsoft OneDrive for all of my Cloud Storage. If you are running on an Apple or a Linux Operating System, the process will look slightly different, but the concepts will be exactly the same.
For my workflow, I use the Adobe Lightroom Classic Desktop Application. The online version of Adobe Lightroom does not have the full capabilities of the Desktop Application. Here is an overview of my current editing workflow:
- Copy photos from the SD card to folders on my workstation by date and event.
- Backup your photographs.
- Import folder/photos into Adobe Lightroom.
- Convert photos from ARW raw format to DNG format.
- Add Copyright Information to photos.
- Add Location and other Keywords to the group of photos.
- Cull, Crop, Edit photos as desired.
- Export Photos and Post on Social Media.
I will describe each of the steps in more detail in the following sections.
Transferring Photos from the Camera or Phone
Computer File Structure
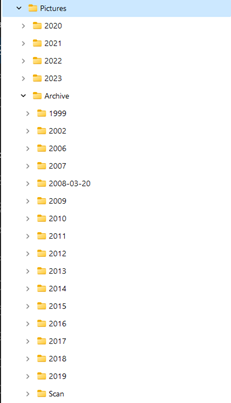
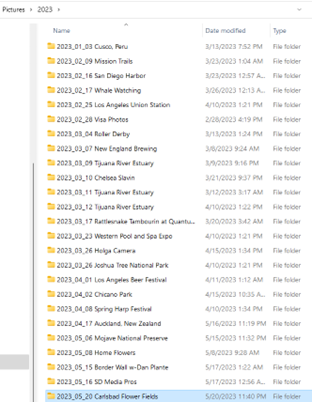
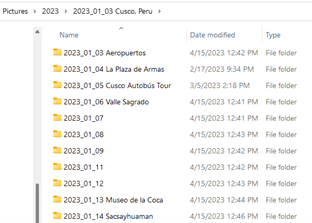
The key to my workflow process is to create the file structure on my workstation first. Currently, I have over 90,000 photographs or video files in my Adobe Lightroom catalog. My folder structure is Year (YYYY) and within the year folder I have subfolders with the trip, event, or people that I am photographing in the format of YYYY_mm_dd [Name of trip, event, or people].
For multiple day trips or events, I use the start date as the top folder and each day of the event in its own subfolder.
My current camera is A Sony A7iii. The Sony A7iii has two SD card slots and I have the camera configured to use Slot A first, and if it is filed, start using the card in Slot B. I use SD cards with 128 GB and have not run out of space in a day of shooting photographs only, but occasionally I will if I am shooting video.
I start out by creating my subfolder for the day on my workstation. Next, I remove the SD card(s) from the camera and copy the files from the SD card to the newly created subfolders. This can take a few minutes with several photos or with videos. I leave the files on the SD cards after this step and until I have them backed up in another location.
Transferring Photos from the Mobile Phone
For my photos I always upload them to a Cloud location (Microsoft OneDrive) once I have a strong wi-fi connection. If I have just returned home or to my hotel, I will have to wait a few minutes or even hours for the files to upload to the Cloud depending on how many photographs and videos I took with my phone.
Once I verify that all the files are uploaded to the Cloud, I select them as a group by day and download them to my workstation or tablet (if traveling). The files are extracted from the zip format and placed into the proper subfolder(s).
Backup the Photos!
This is the most important part of your workflow! You do not want to lose photographs of your family vacations, your family and friends; and you certainly do not want to lose photographs of a client-shoot. If you have to tell your client that you lost the photographs and have to redo a photoshoot, you can lose a customer for life.
I use multiple External Hard Drives as part of my Backup process. I use one External Hard Drive (or workstation) as my primary Adobe Lightroom Catalog, I have a second External Hard Drive for the Backup files, and if the photographs are extremely important – client files, or special family occasions, I will upload them into the Microsoft OneDrive Cloud location, using the same file structure as my workstation.
Once the files are successfully transferred to one or more locations, I can delete the files from the SD Card, or put the SD card into the camera and format the card. I reuse my SD cards daily, so the transfer, copy, and backup process is done after every day of taking photographs.
Importing Photos to Adobe Lightroom
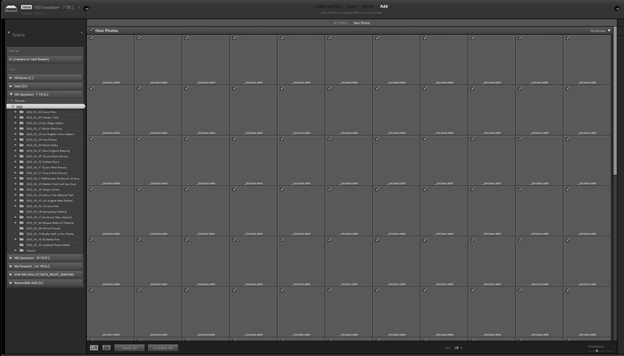
I use the Import à Add files to Import the new photographs into my Adobe Lightroom Catalog. Because my files are already in the correct subfolders, Adobe Lightroom will not move them if you use the Add function. I scroll down to the newly imported photographs and review the set.
Converting Photos from RAW Format
I always shoot in RAW format on my cameras that have the ability. The Sony Camera Settings that I use are:
- File Format: RAW
- RAW File Type: Uncompressed
- JPEG Quality: Extra Fine
- JPEG Image Size: Large:24 MB
- Aspect Ratio: 3:2
Using these settings my photographs are 48 MB in size and the file extension for Sony RAW files is ARW. I convert all of my RAW formatted photographs to the DNG format. This makes editing from different cameras much easier.
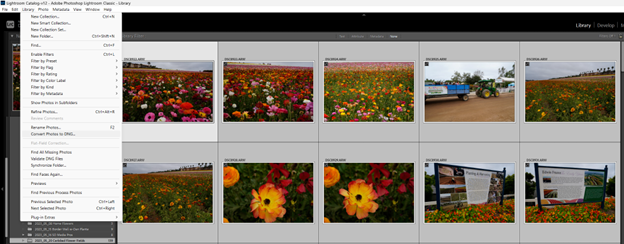
To do the conversion, I select all the files in the subdirectory and choose the following Adobe Lightroom menu selection: Library à Convert Files to DNG and get this window:
I select Only convert Raw files and Delete originals after successful conversion. This process will take several minutes for a large group of photographs. Once this step is done, all my RAW files are in DNG file format and can be easily edited in Adobe Lightroom and many other editing software programs.
Adding Copyright and Keyword Information
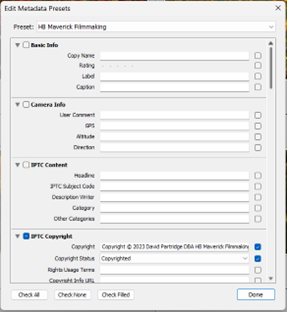
After the files are converted to DNG, the complete set is still selected, and I add my Copyright Information to the set. You can create your own Preset to add your Copyright Information as shown above.
Adding Keywords is a crucial step in my workflow. I use my collection of photos for a variety of uses – client work, specific project work, my blog, and homework. By adding specific Keywords to my photos, I can easily search for a location or specific theme. I use a hierarchy for my Keywords, i.e., Composition –> Birds Eye View, Contrast, Texture, etc.; or Country –> Peru –> Cusco or Lima. Use whatever Keywords that will make your searching for specific photographs easier and faster.
Editing Process
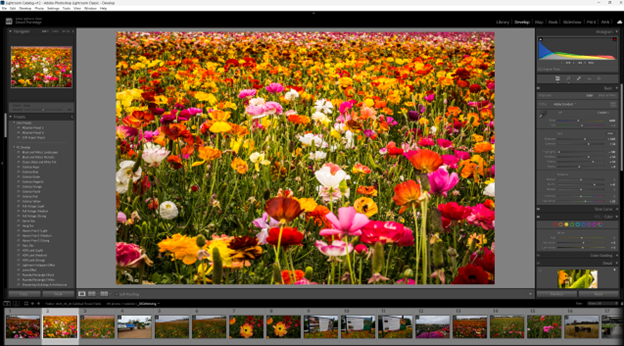
This paper is not about editing the files, but rather the workflow that goes along with the editing process. At this point I Cull, Crop, and Edit as desired. Some photographers flag their best photographs to come back and edit just those. I do not take that step as I can gauge as I go through the photos which ones I want to edit further for whatever project on which I am currently working with.
My first step is to review all the photos and delete ones out of focus and stray photos. The next step is to review duplicate or near-duplicate shots. Normally I will delete extra duplicate shots, but before I do, I go back-and-forth all of the photos in full screen mode and keep what I think is the best one and delete the others.
I try not to crop my photographs unless needed, a person that can easily be cropped out, or if the composition is off somewhat. I make sure my horizon is level and then make any addition crops if needed. The rest of my Editing consists of using Adobe Lightroom Presets or the different sliders and other features available.
Exporting and Posting on Social Media
As I edit specific photographs that I may use for Social Media or other purposes, I export it to a specific subfolder; for me, I will use Export as the name and place the new folder under the same directory as the one I am editing. The Export Window has several settings that you can use, and you can change your settings at any time. There is a specific setting that I use:
The first checkbox places the exported photo into the Export Subfolder under the folder that I am editing. The second checkbox, Add this photograph to the Adobe Lightroom Catalog.
I save the Exported files in the JPEG file format. I post photographs to different platforms and some of them have a 20 MB file limit size. For Social Media or blog posts, I set the maximum file size of my exported file to 19 MB so there are no problems uploading and posting. If these photographs are for a client, I will uncheck the Limit File Size checkbox, so I get the highest resolution possible.
One last setting that I use when I Export my photos is to Write Keywords as Lightroom Hierarchy. By selecting the All Metadata to your exported files, the Copyright and the same Keywords that you added to the original photo are copied it to the exported photograph. With this step you do not need to re-add the Copyright information and by adding the Keywords makes it easy to find already edited photographs to be used in a new project.
What About Video Files?
I struggled with this dilemma for a long time. Previously my projects were either photographed-based or video-based, but as video became more and more common, now many of my projects use both. I solve this by using the same file structure as my photographs, but with a different location for my video files. I use a video top folder, with Year, and dates exactly as I do for photographs. This keeps my two types of files separate, but I can use the same Keywords to search for video files when needed. I have been using this system for over a year, and it is working well for me.
Your Workflow
Remember, there is no one correct way to create your own editing workflow. Find a process that works for your needs, is easy to follow, and most importantly; once the workflow is in place, always follow your own processes every time you add new photographs or videos to your collection! Have fun with your workflow!
See our adventures on YouTube: @HBMaverick
Read the story and view the photographs on Street Photography in Balboa Park.
“We will see YOU on the next adventure!”

